


Wood Plastic Composite (WPC) Decking Guide
Our Decks Are Designed With An Eye On Quality & Looks At Factory Direct Prices!
- Wood Plastic Composite (WPC) Material
- Resistant to Mold, Mildew, Rotting, & Termites
- 100% Waterproof, Non-Toxic, Anti-Slip, Scratch, Stain, & Fire Resistant!
- Easy to Install!
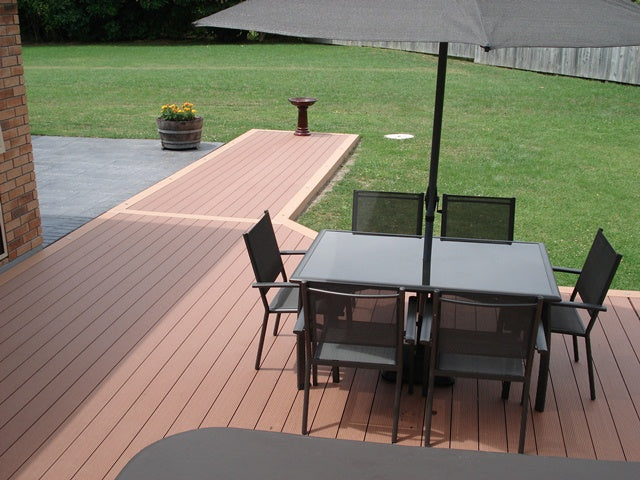
- Enhances your outdoor space
- No painting or staining is required
*** Disclaimer - Please read all instructions before installing your new deck.
Installers may find this process to be similar to the installation of a wood deck. However, there may be instructions that are different from traditional wood decking. All designs need to be reviewed by a licensed architect, engineer, or local building official before installation. Decking plans must meet local building codes before you begin the installation process. Decking planks may vary slightly in color.
The pattern of each individual plank may alter. Weather can cause natural expansion and contraction of Wood Plastic Composite (WPC) decking. This means that the greater the square footage, the more expansion space is required. Please follow all directions when installing your deck. If directions are not followed completely, it could affect the safety and the look of your deck. If your decking is not properly installed, it may void your warranty.
***Extreme Heat Warning
Be aware of excessive heat on the surface of our products from external sources, such as, but not limited to: fire, direct sunlight, and reflection of sunlight from energy efficient window products. Low-Emission (Low-E) glass can potentially harm the actual deck. Low-E glass is designed to prevent passive heat gain within a structure. It can occasionally cause unusual heat build-up on exterior surfaces. The extreme heat can potentially cause products to melt, sag, warp, discolor, increase expansion, and accelerate weathering. For this reason, we do not recommend placing rubber or vinyl products on the deck’s surface. If you have concerns about possible damage by Low-E glass, you should contact the manufacturer of the product.
Tools Required
| Cordless Driver | Carpenter Square | Chalkline | Spacing Tools |
| Tape Measures | Circular Saw | Jig Saw/ Power Meter Saw | Safety Glasses |
How To Measure Square Footage
- Calculate square footage by multiplying the length & width
Example: 24’(Length) x 8’(Width) = 192 Square Feet - We recommend adding 10% to the square footage. This will help cover waste, trimming,
and future replacements.
Example: 192 Square Feet x 110% (192 x 1.1) = 211.2 Square Feet
Gapping Requirements
- Side to side plank gapping must be a minimum of 1/8” – a maximum of 5/32”
- Plank to plank gapping must be a minimum of 1/8” – a maximum of 3/16”
- Allow a 3/16” minimum gap where the planking meets any adjoining structure or post
Butt Joint Gapping Requirements
| 32°F and below | 33°F to 74°F | 75°F and above |
|---|---|---|
| 3/16" gap (4.76mm) | 1/8" gap (3.18mm) | 1/32" gap (0.78mm) |
Butt Joint Gapping Guidelines For Natural Expansion Of Your Deck
To calculate expansion, you must multiply the deck length (inches) with the change in
temperature (°F) from summer to winter, and 0.000045.
Example: 192” x 100°F (120°F subtract 20°F) x .000045 = .864”
Based on the example above, you can see that a 16’ board will change by 0.864” in length from
the cold of winter to the heat of summer.
Joists Spacing
- Layout the joists where installation is necessary.
- Once everything is lined up properly, you may install your joists at 12”, 14”, or 16” on center.
- Be sure that all joists are level.
Installation Process For Joists

- 1. Drill a hole on concrete ground along the length of the joist. The size of the hole should be about .5” and the depth should be 2.5”. For every 15” section, drill a hole and if it is less than 15”, only a single hole needs to be drilled.
- 2. Hammer a pine wood stopper into the concrete hole.
- 3. Next, place the joist on corresponding spot, and drill a hole on the joist. The spot on the joist where you drilled a hole should line up with the spot where you drilled into the concrete.
- 4. Use a screw to fasten the joist.
Attaching The Deck

- 1. The first floor should be placed horizontally.
- 2. Next, fasten the outside facing board with a screw at a 55°angle for every place where the boards cross.
- 3. From the second floor, use the screws to fasten the deck planks.
Fastening Instructions
- 1. Insert one side of the fastener. Place the heavier end of the fastener upwards. The drilled out hole should be vertical with the ground. Place into the groove of the first floor.
- 2. Close one side of the second floor to the first line of fasteners. Insert the second line of fasteners to the other side of the second floor.
- 3. Close the third floor.
- 4. Repeat this process.
- 5. After installing about 8 deck planks, use the screws to attach each of the fasteners to the joists.
- 6. After installing all of the floors, fasten the final floor the same as the first floor, use a screw to fasten at a 55°angle.
Important Information Regarding The Draining Of Water From The Deck’s Surface
- 1. It is necessary to pre-drill holes on the joists before attaching screws. The size of the drilled out holes should be about 0.13”.
- 2. The ends of decking planks can be sealed by matching end caps. Fascia boards can also be applied to the outwards facing areas of your deck. Be sure to install correctly.

- 3. If either ends are sealed by an end cap, it is important to drill holes at the bottom of the deck. This will allow water to drain. The drainage holes should be aligned in a diagonal direction (from corner to corner). Each drainage hole should be about 0.2”.
- 4. We recommend a maximum overhang of 2” (from the deck to the joist).
- 5. The concrete foundation needs to have a slight tilt before installing the deck floor. This is designed so that water drains off the surface of your deck. If joists are vertical with the current structure, a gap is needed when installing the joists. The gaps must be staggered for proper drainage.

Decking Accessories
